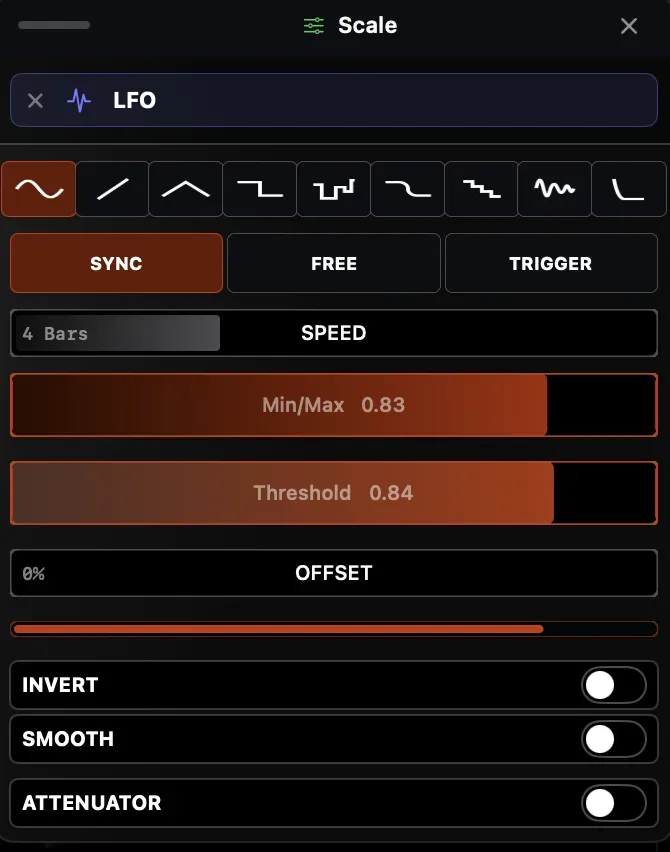
LFOs
An LFO (Low Frequency Oscillator) generates a repeating waveform and feeds it into one or more parameters.
LFO waveforms
Section titled “LFO waveforms”| Shape | Character |
|---|---|
| Sine | Smooth, continuous oscillation |
| Triangle | Linear ramp up then down |
| Square | Instant switch between min and max |
| Smooth Square | Square with softened transitions |
| Ramp | Linear ramp up, instant drop |
| Staircase | Quantized ramp in discrete steps |
| Bounce | Elastic bounce curve |
| Pulse | Short spike, long low |
| S&H | Random value, held each step |
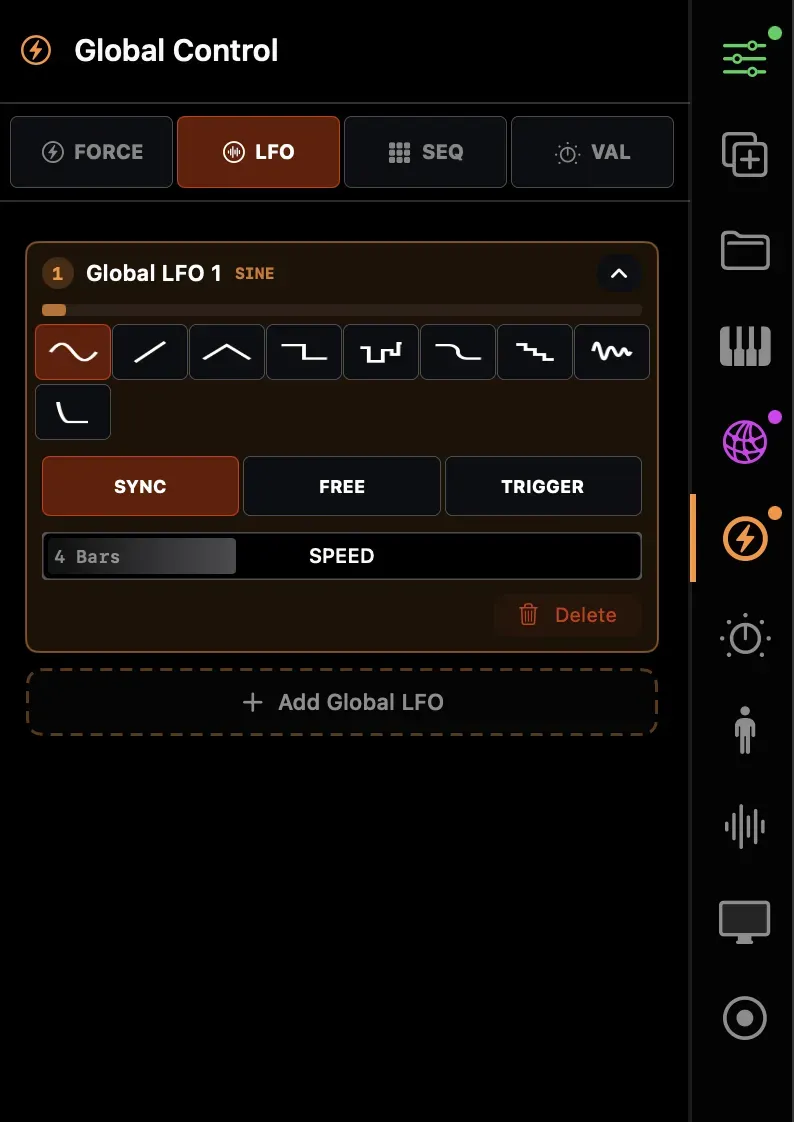
LFO rate can be set in three ways:
- Synced — locked to the project tempo in musical divisions (1/4, 1/8, 1/16, 1/2, 1 bar, etc.)
- Free (Hz) — absolute frequency in Hertz (e.g. 0.5 Hz = one cycle every 2 seconds)
- Triggered — advances the LFO by a configurable step per external trigger (e.g. a MIDI note or any mapped source). Step size ranges from 1/32 to 1/1 of a cycle, or Phi for a low-discrepancy non-repeating sequence. Default step is 1/4.
Synced LFOs follow Ableton Link or the internal tempo clock.
Creating an LFO
Section titled “Creating an LFO”- Right-click any float parameter → Map to LFO → New LFO
- An LFO is created and linked to the parameter
- Adjust rate, shape, and depth in the parameter’s modulation inspector
Global LFOs
Section titled “Global LFOs”Global LFOs (purple, accessible from the sidebar) are shared across the entire project. Map multiple parameters across different tracks and effects to the same global LFO to lock them in sync.
Phase offset
Section titled “Phase offset”Each parameter-LFO mapping has an independent phase offset. This lets you drive multiple parameters from the same LFO but offset in time — e.g. a 90° offset between X and Y for circular motion.