Track Configuration
Every configured track has two layers of controls in its inspector panel: a set of always-visible blend controls in the main body, and a settings popover for everything else.
Opening the settings popover
Section titled “Opening the settings popover”Click the ⚙ gear icon in the top-right corner of the track inspector header. The popover slides out to the right and stays open until you click elsewhere.
Track name and color
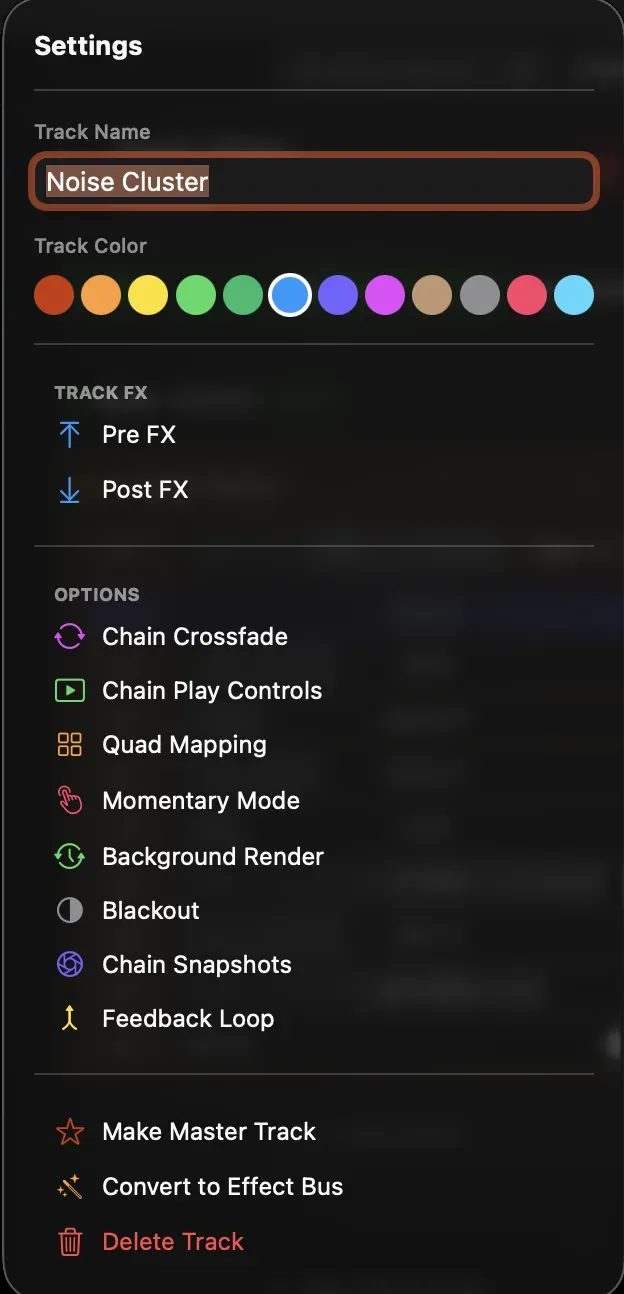
Section titled “Track name and color”At the top of the popover:
- Track Name — type a new name directly in the text field. The name appears on the track tile in the timeline.
- Track Color — click any swatch in the 12-color grid to change the track’s accent color. This color is used for the track tile border, the inspector header icon, and the chain slot bar.
Blending
Section titled “Blending”The Dry/Wet and blend mode controls sit in the main inspector body, always visible below the header.
| Control | What it does |
|---|---|
| Dry/Wet | Controls how much of this track’s output is composited into the master mix. 0 = silent (invisible), 1 = full contribution. |
| Blend mode | The compositing operation used when merging this track’s output with the tracks below it. Options include Mix, Add, Multiply, Max, Screen, and others. |
Both controls are MIDI-mappable — right-click either to assign a MIDI CC or open the mapping panel.
Feedback slider
Section titled “Feedback slider”When the active chain has Feedback Loop enabled, a Feedback slider appears directly below the Dry/Wet row. This controls the strength of the feedback blend (how much of the previous frame feeds back into the current frame).
Track FX
Section titled “Track FX”Enabled in the settings popover under the TRACK FX header.
| Toggle | What it does |
|---|---|
| Pre FX | Adds a persistent effect slot that runs before every chain on this track. Useful for input processing that should always be applied regardless of which chain is active — for example, a colour correction or input mask. Effects added here are stored in lockedPreEffects. Enabling Pre FX also unlocks Track Macros for these effects. |
| Post FX | Same idea, but the effect slot runs after every chain. Useful for output-level processing — watermarks, output colour grades, or a persistent feedback blend. Effects are stored in lockedEffects. |
When Pre FX or Post FX are enabled, their effect cards appear inside the main inspector body, labelled with TRACK PRE FX and TRACK POST FX dividers.
To add an effect to a Pre FX or Post FX slot, use the dashed Insert button that appears at the bottom of each section.
Options
Section titled “Options”All of these are toggles in the OPTIONS section of the settings popover.
Chain Crossfade
Section titled “Chain Crossfade”When enabled, switching chains triggers a smooth animated blend instead of an instant cut.
Two sub-controls appear in the main inspector body under a CROSSFADE header whenever this is on:
| Control | Range | Default |
|---|---|---|
| Duration | 0.01 s – 5.0 s | 0.5 s |
| Blend Mode | Any FX blend mode | Mix |
Double-click the Duration slider to reset it to 0.5 s.
Chain Play Controls
Section titled “Chain Play Controls”Shows a Prev / Random / Next navigation row in the main inspector body, plus autoplay controls. Use this when you want to trigger chain switches from the inspector rather than from chain slot tabs — or when you need to MIDI-map the navigation buttons.
Quad Mapping
Section titled “Quad Mapping”Enables per-track perspective quad mapping for projection mapping onto non-flat surfaces. When on, an Output Mapping section appears in the inspector body with an Edit Quad button that opens the corner-pin editor.
Momentary Mode
Section titled “Momentary Mode”Turns the track into a hold-to-show trigger instead of a static layer. While the assigned button or key is held, the track is active; releasing it hides the track output.
When enabled, three sub-controls appear in the inspector body:
| Control | Description |
|---|---|
| Attack | Fade-in time when the button is pressed |
| Release | Fade-out time when the button is released |
| Range | Switches the time scale: 0–500 ms (fast mode) or 0–10 s (slow mode) |
Background Render
Section titled “Background Render”Forces the track to render at a fixed rate independent of the display refresh. Useful for tracks with content that needs frame-exact timing or is computationally expensive enough that it should run on its own cadence.
Blackout
Section titled “Blackout”Forces this track’s output to composite as black — the track remains in the signal chain but contributes nothing visible. Toggling Blackout also automatically converts the track’s blend mode between its normal and blackout variant (e.g. max ↔ maxBO), so the transition is clean.
This is the same toggle exposed by Convert to Layer / Convert to Effect Bus in the actions section — those buttons flip Blackout and update the track type simultaneously.
Chain Snapshots
Section titled “Chain Snapshots”Shows a row of 8 numbered snapshot slots below the active chain name in the inspector. Each slot stores a full parameter snapshot for that chain (all effect parameters at the moment you save). Snapshots are MIDI-mappable for instant recall during a performance.
See Snapshots → for details on how they work.
Feedback Loop
Section titled “Feedback Loop”Toggles isFeedback on the currently active chain — the same switch found on the chain’s own settings. It’s surfaced here as a convenience so you can enable feedback from the inspector without digging into the chain bar.
When enabled, the chain’s effect list splits into PRE FEEDBACK and POST FEEDBACK sections, and the Feedback slider appears in the blending area.
Actions
Section titled “Actions”These appear at the bottom of the settings popover for all tracks except the master track.
Make Master Track
Section titled “Make Master Track”Promotes this track to the project’s global Master Track — the final compositor stage whose output goes to all displays and recordings.
If the existing master track already has effects, a dialog asks whether to Append (add this track’s chain effects to the master’s first chain) or Replace (swap the master’s chains entirely with this track’s chains).
The source track is removed from the timeline after the operation.
Convert to Layer / Convert to Effect Bus
Section titled “Convert to Layer / Convert to Effect Bus”Flips the track between Layer mode (produces its own output) and Effect Bus mode (processes output from other tracks, composites as black by default).
- Convert to Effect Bus — enables Blackout, rewrites the blend mode to its BO variant, sets track type to
effectBus. - Convert to Layer — disables Blackout, reverts the blend mode, sets track type to
layer.
Delete Track
Section titled “Delete Track”Removes the track from the project. This cannot be undone.